Writing / Blockchain & Solidity · · 2 min read
Setup Private Blockchain using Geth
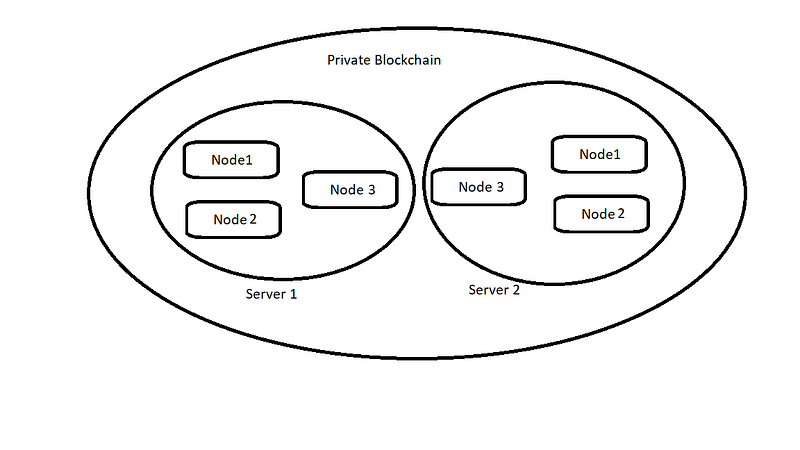
Blockchain is the future and no one can deny this fact. But in blockchain world, everything is public and there is no private world here but for some applications it become very difficult to hide sensitive data or data that they don’t want to be public at the same time they want to use the advantages of blockchain i.e. distributed and secure. In this case they can setup their private blockchain with some trusted nodes in few steps. Setting up a private blockchain also won’t cost much. You just need 2–3 normal CPUs. Let’s start building our own blockchain.
Geth (Go Ethereum) is an open source library(go client) for ethereum. We will use it.
Without any further delay let’s get started. We will be creating total 6 nodes on 2 server(3 nodes each).
Step 1 :
Download geth from here:
**Step 2 **:
Create directories in both server
mkdir node1
mkdir node2
mkdir node3
Step 3 :
Create accounts in each directory and note down the addresses. We will use them later.
geth --datadir node1 account new
geth --datadir node2 account new
geth --datadir node3 account new
Step 4 :
Create a password.txt file and save your account password so that we can use it easily.
vim password.txt
Step 5 :
Create a genesis file to create first block in your blockchain known as genesis block. We will use puppeth for it, you can also create it manually like this:
Create a genesis file - Hyperledger Besu
puppeth
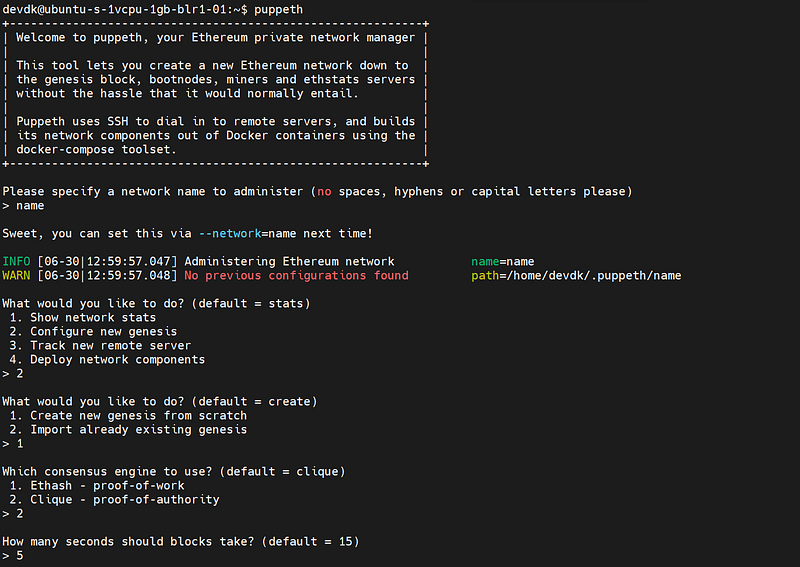
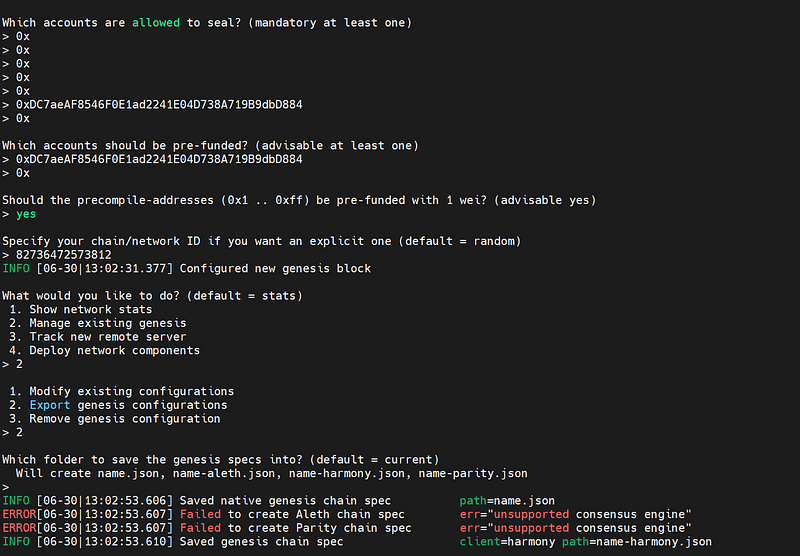
Follow these steps and a <name.json> genesis file will be created. Provide all the account addresses for sealing and pre-funded that you created earlier.
Copy this file in every server you want to create nodes and remember if anything is different, your blockchain peers will not sync with each other.
Step 6 :
Create genesis block in data directory you created earlier
geth --datadir node1 init name.json
geth --datadir node2 init name.json
geth --datadir node3 init name.json
A new genesis block will be created.
Step 7 :
Start the nodes one by one and note their enode values to connect to different peers.
geth --datadir node1 --networkid "networkid" --nodiscover console --nat=extip:<ip-of-server> --port 30301
geth --datadir node1 --networkid "networkid" --nodiscover console --nat=extip:<ip-of-server> --port 30303
geth --datadir node1 --networkid "networkid" --nodiscover console --nat=extip:<ip-of-server> --port 30305
Type your networkid after — networkid flag , — nat flag is used to specify the ip address to connect to peers on different server. If not specified it will use 127.0.0.1 or localhost and you can add peers inside the server itself.
Step 8 :
Now run every node one by one using some extra flags to create RPC and WebSocket servers also if you want.
geth --datadir "node1" --nodiscover --port "30301" --ws --ws.origins "*" --ws.addr "ip-of-server" --ws.port "8550" --nat=extip:ip-of-server --http --http.addr "ip-of-server" --http.port "8545" --http.corsdomain "*" --http.api "personal,eth,net,web3,txpool,miner" --networkid "network-id" --miner.gasprice "0" --allow-insecure-unlock --unlock "address-inside-node1" --password password.txt --mine --bootnodes "enode-of-some-other-node"
This will create a RPC server i.e. RPC url will be -> ip:port specified with http flag and to receive events websocket server will be -> ip:port specified with ws flag. We will be starting our other nodes without exposing http and ws server.
geth --datadir "node2" --nodiscover --port "30303" --nat=extip:ip-of-server --http.api "personal,eth,net,web3,txpool,miner" --networkid "network-id" --miner.gasprice "0" --allow-insecure-unlock --unlock "address-inside-node2" --password password.txt --mine --bootnodes "enode-of-some-other-node"
geth --datadir "node3" --nodiscover --port "30305" --nat=extip:ip-of-server --http.api "personal,eth,net,web3,txpool,miner" --networkid "network-id" --miner.gasprice "0" --allow-insecure-unlock --unlock "address-inside-node2" --password password.txt --mine --bootnodes "enode-of-some-other-node"
Step 9 :
After starting every node, connect peers with each other by accessing the console using this:
Travel to the node folder and run this:
geth attach geth.ipc
A js server will be started where you can see the blocknumber and everything else. We will use admin.addPeer() to connect to other peers and admin.peers to see all peers connected.
admin.addPeer("enode-of-other-nodes")
Step 10 :
Your blockchain will be up and running and you can see logs of block mining and blocks reaching to canonical chain.
You can add the network to metamask and start doing transactions.
I hope you liked the blog, don’t forget to hit that clap icon and if you get struck anywhere, leave a comment here I will try to help you………
Written by Dikshant Rajput, AI and full-stack engineer. Also published on Medium. Questions? Ask my AI version or get in touch.